
In this post we will show you two different ways to get up and running with Spark. The first is to use Domino, which has Spark pre-installed and configured on powerful AWS machines. The second option is to use your own local setup — I’ll walk you through the installation process.
Spark Overview
Spark is a fast and general-purpose cluster computing platform that works well for many types of parallelizable tasks data scientists need to perform every day. Spark extends MapReduce, which only has two operators, to include a much wider set of interactive analytical query and stream processing options. Probably the biggest advantage of Spark is its ability to run computations in memory. The Spark website says it runs programs up to 100x faster than Hadoop MapReduce in memory, or 10x faster on disk.
There are two reasons Spark is so powerful. First, it offers a great syntax for expressing parallel computing tasks. Second, it drastically simplifies scaling jobs out across a cluster. Spark brings us closer to real-time analytical number crunching. As someone that works in the Internet of Things space, this possibility is not only interesting but crucial for the future of sensor-based triggers, alerts, and actionable intelligence. The future of many applications hinges on "real-time" processing of multiple data types in a quick manner in order to deliver faster results to customers.
Spark running in Domino
Domino lets you run your own code on any type of EC2 machine (or on your own hardware, when installed on premise). This lets us run Spark code on a single machine with up to 32 cores, without any setup or configuration. Everything is pre-configured on Domino’s end so you don’t have to install anything.
In this post, we will be testing out Spark’s core parallelization capabilities using one of the out-of-the-box MLlib algorithms.
Let’s skip the Hello World of big data — counting words — and go right to something a bit more interesting. If you were wondering, Spark supports two linear methods for binary classification: support vector machines (SVMs) and logistic regression.
In Python, we start by importing the appropriate Spark libraries.
from pyspark import SparkContext
from pyspark.mllib.regression import LabeledPoint
from pyspark.mllib.classification import LogisticRegressionWithSGD
The first of these, SparkContext, is hands down the most important component of Spark. Why? SparkContext is your connection to the Spark cluster and can be used to create the ever-important RDDs we discussed earlier.
RespectTheSparkContext
Now we can start up our Spark with:
sc = SparkContext(appName="PythonLR")Next, we need to make sure the features and labels for each data point are formatted in a way that MLlib likes. NOTE: If you’re used to labeling binary classifications with -1 and 1, then you’ll have to switch -1 labels over to 0 in MLlib. Thankfully, making this switch is simple. If you forked this project, be sure to format your data "correctly" first! The following function splits up values in a dataset (line by line), converts any -1s to 0s, then returns a set of labels/features in LabeledPoint format.
def parsePoint(line):
    values = [float(s) for s in line.split(' ')]
    if values[0] == -1:   # Convert -1 labels to 0 for MLlib
        values[0] = 0
    return LabeledPoint(values[0], values[1:])
The next line is a big one. It creates our RDD with our chosen dataset, then performs a map transformation. In this case, we already created the map procedure we need with our parsePoint() function.
points = sc.textFile("sample_svm_data.txt").map(parsePoint)Finally, we create set the number of iterations, train our logistic regression model with stochastic gradient descent, print some final weights and intercept values, then shut down our Spark cluster at the end.
iterations = 5
model = LogisticRegressionWithSGD.train(points, iterations)
print("Final weights: " + str(model.weights))
print("Final intercept: " + str(model.intercept))
sc.stop()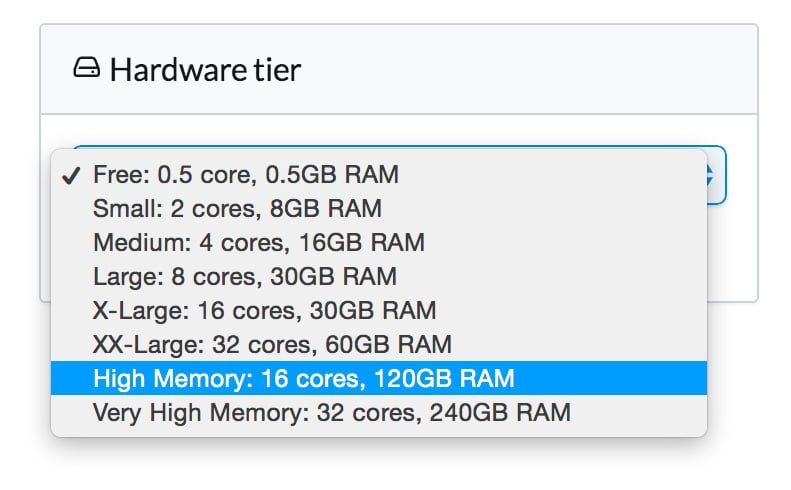
Have a big data set that could benefit from Spark’s robust data processing? Go to "Hardware tier" in the Domino project settings and scale up as needed. Spark + Domino is a pretty amazing combo to have handy. I am only demoing a small dataset use case here, but I highly encourage testing out the performance changes in Domino when scaling up the hardware with your own data. What’s interesting is how powerful Spark is on running across a “cluster” of up to 32 cores...when that cluster is actually only running on one machine. This isn’t to say you can’t use Spark on 8 machines with 4 cores each, but if you’ve got 32 cores on one machine why not make them sing, right?
Let’s take a look at outputs using different hardware tier settings.
Small (2 cores, 8GB) | 26s |
|---|---|
Medium (4 cores, 16GB) | 22s |
X-Large (16 cores, 30GB) | 35s |
XX-Large (32 cores, 60GB) | 19s |
GPU (8 cores, 15GB) | 14s |
There are some surprising results here. First, the 16-core machine (an EC c3.4xlarge) is much slower than expected. We aren't sure why this is -- it wouldn't be the first time we've seen an odd configuration on one particular type of EC2 machine. The second surprising result is how fast the GPU instance is (an EC2 g2.2xlarge), even though it has fewer cores). The moral of the story here is that bigger is not always better =)
Btw, if you already have your own Spark cluster set up, Domino can also connect to it and run code there.
Local Install
In case you ever get stranded on a desert island with a laptop and no Internet access, here is how to install Spark on your own environment. JSpark is built on Scala, but if you have the foggiest clue of how to code in Scala and prefer languages like Python then you will be fine. In fact, as of the latest Spark version (1.4.0) you can use R. Personally, I find Python or Java a better Scala choice if you plan to create deployable applications/products, but if you just need to run "one off" scripts in R then Spark works splendidly.
The Spark docs give a not-so-satisfactory install guide, so if you are a Mac user I highly recommend this tutorial. Linux users should check this tutorial out. No matter what the OS, installing Spark was a pretty painless experience. The process to follow is mainly this:
- Make sure you have version 7 or 8 of the Java Development Kit installed
- Install Scala
- Download Spark from https://spark.apache.org/downloads.html
- cd into the Spark download directory and run:
sbt/sbt clean assembly - Run Spark from Python with:
./bin/pyspark
I don’t know about you, but I constantly forget to add new paths to my .zshrc or .bashrc file. I am sure most of you are way ahead of the curve here, but for the rest of you easily distracted individuals like myself, below is a sample of my new additions to my .zshrc file. Be sure to change based on your unique install paths otherwise your shell will throw you errors.
prettyprint lang-sh
export JAVA_HOME=$(/usr/libexec/java_home)
export SCALA_HOME=/usr/local/bin/scala
export PATH=$PATH:$SCALA_HOME/bin
export SPARK_HOME=~/spark-1.4.0
export PATH=$PATH:$SPARK_HOME/bin
export PYTHONPATH=$SPARK_HOME/python:$SPARK_HOME/build:$PYTHONPATH
One other quick tip. Spark is waaaaaay too talkative for my liking. Just gimme the basics, man! I made Spark less verbose by switching the INFO prints to just WARN like this:
cd ~/spark-1.4.0/conf
cp log4j.properties.template log4j.properties
Edit log4j.properties and change the following line to set log4j.rootCategory to log only warnings and errors by changing anything that says INFO to WARN. Save and close the file and you’re all set.
You can find the logistic regression example we ran earlier in Domino in the examples section within your Spark install. Spark comes with some very nice MLlib examples that you can find under:
$SPARK_HOME/examples/src/main/python/mllib/. Spark also provides some basic datasets to start with under $SPARK_HOME/data/mllib/.Further Reading
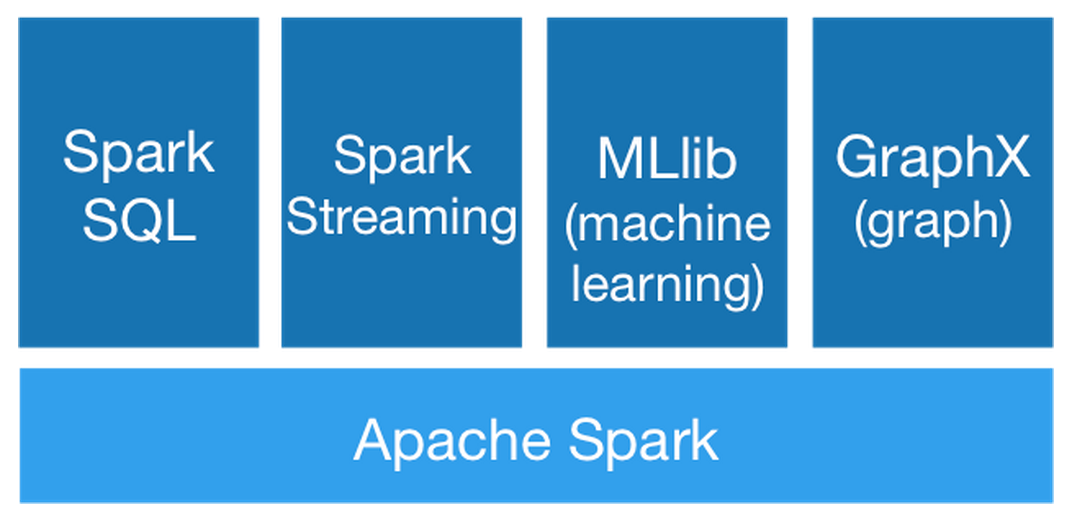
Now that you have a platform to easily scale your jobs with, naturally there are packages on top of Spark’s core that Apache supports in order to make the entire data routing, storage, and processing process easier. The diagram below shows the current Spark ecosystem which includes Spark SQL for data query, Spark Streaming for real-time stream processing, MLlib for out-of-the-box machine learning algorithms, and GraphX for all you graph theory enthusiasts out there.
There is plenty to learn in Spark that will keep you busy for a while. If you want to go deeper into the rabbit hole, I recommend getting the O’Reilly book Learning Spark.
RELATED TAGS
SHARE
Other posts you might be interested in


Subscribe to the Domino Newsletter
Receive data science tips and tutorials from leading Data Science leaders, right to your inbox.
By submitting this form you agree to receive communications from Domino related to products and services in accordance with Domino's privacy policy and may opt-out at anytime.