Benchmarking NVIDIA CUDA 9 and Amazon EC2 P3 Instances Using Fashion MNIST
Josh Poduska2018-09-10 | 8 min read

In this post, Josh Poduska, Chief Data Scientist at Domino Data Lab, writes about benchmarking NVIDIA CUDA 9 and Amazon EC2 P3 Instances Using Fashion MNIST. If interested in additional insight from Poduska, he will also be presenting "Managing Data Science in the Enterprise" at Strata New York 2018.
Introduction
Perhaps you’ve heard the buzz about NVIDIA’s CUDA 9 software and Amazon EC2 P3 instances. The word is that they are lightning-fast when put to the task of training deep learning networks.
CUDA is a parallel computing platform and programming model developed by NVIDIA for general computing on GPUs. CUDA 9 is the next iteration at improving performance across a wide array of applications and products. NVIDIA claims CUDA 9 offers some significant advantages, such as:
- Speeding up deep learning with new GEMM kernels in cuBLAS.
- Providing a new programming model for flexible thread management.
- Improved compiler and developer tools.
- Ability to execute AI apps faster with Tensor Cores, 5X faster than Pascal GPUs.
Amazon P3 EC2 instances use the new Volta GPUs (NVIDIA Tesla V100). Amazon claims to provide up to 1 petaflop of mixed-precision performance per P3 instance. In internal benchmarking, deep learning training on large jobs went from days to minutes when comparing to CPUs.
I decided to give these two pieces of technology a test drive on a deep learning image classification problem to see how much of a performance boost I could achieve compared to previous-generation options.
Deciding on an Approach
In the quest to find a good neural network, data scientists must optimize a large parameter space which includes the type of network, number of nodes, number of layers, dropout rates, data augmentation, and learning rates. Training networks over this space takes a lot of time. Additionally, as the deep learning landscape evolves, the trend is moving toward deeper nets with more complexity (for example, research being conducted on genetically mutating large networks). The bottom line is that compute performance is a chief factor influencing a data scientist’s ability to build an accurate neural network.
I chose to run my test on the Fashion MNIST dataset, the popular replacement for the handwritten digit MNIST dataset, which offers a greater accuracy challenge. Each image is an article of clothing and the goal is to correctly classify the images. Here is a snapshot of a few of the images from my Jupyter notebook.

Most first-attempt networks on MNIST Fashion achieve around 90 percent accuracy and might only take a few minutes to train. I wanted to find a network that would push the envelope a bit—one that would take longer to train and deliver greater accuracy than a simple CNN. I came across a post by Danial Khosraivy in which he took inspiration from the VGG CNN and created a VGG-like CNN with batch normalization and data augmentation on the Fashion MNIST dataset. This presentation by Mathew Cord has some helpful structural diagrams to visualize what a VGG network looks like.
I made the following modifications to Danial’s code.
- Added code to pass in a user-parameter to easily run experiments.
- Added a timer to keep track of how long it takes to build the model.
- Added a confusion matrix to see where improvements in accuracy can be gained.
- Exported a JSON file containing accuracy and time so runs can be easily compared.
- Made minor code changes to make training work on TF 1.4.1 for the CUDA 8 / P2 test.1
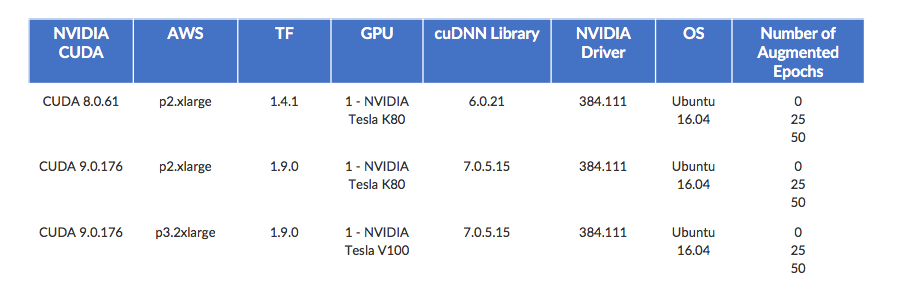
To compare CUDA 9 on P3 instances, I tested CUDA 8 on P2 and CUDA 9 on P2. The code splits the original training data into 80/20 training/validation to check for overfitting. The model is trained for 10 epochs at a learning rate of 0.001 and then another 10 epochs at 0.0001. After those initial 20 epochs, data augmentation is added, which generates new training samples by rotating, shifting, and zooming the original training samples. It is then trained for another round of epochs on this new data. This training on augmented data is the longest part of the benchmark. I wanted to test the effect of data augmentation on accuracy and performance, so I made the number of epochs trained under data augmentation a user-provided parameter. My test plan covers no augmentation, 25 augmented epochs and 50 augmented epochs for each CUDA/instance combination.
Here is a layout of my test plan.
You can see, run and download the full project, including code, at no cost on the Domino Data Lab trial site (Domino covers the AWS costs). You’ll need to log in or sign up to do more than view the project files. Once you log in, check out the README file for more details.
Here’s a snapshot of the code to build the VGG-like CNN.
vgg_cnn = Sequential([
    Lambda(norm_input, input_shape=(28,28, 1)),
    Conv2D(32, kernel_size=(3, 3), activation='relu', padding='same', input_shape=input_shape),
    Conv2D(32, kernel_size=(3, 3), activation='relu', padding='same'),
    BatchNormalization(),Dropout(0.25),
    Conv2D(64, kernel_size=(3, 3), activation='relu', padding='same'),
    Conv2D(64, kernel_size=(3, 3), activation='relu', padding='same'),
    MaxPooling2D(pool_size=(2, 2)),Dropout(0.25),
    Conv2D(128, kernel_size=(3, 3), activation='relu', padding='same'),
    Conv2D(128, kernel_size=(3, 3), activation='relu', padding='same'),
    BatchNormalization(),Dropout(0.25),
    Conv2D(256, kernel_size=(3, 3), activation='relu', padding='same'),
    Conv2D(256, kernel_size=(3, 3), activation='relu', padding='same'),
    Conv2D(256, kernel_size=(3, 3), activation='relu', padding='same'),
    MaxPooling2D(pool_size=(2, 2)),
    Flatten(),
    Dense(512, activation='relu'),
    BatchNormalization(),
    Dropout(0.5),
    Dense(512, activation='relu'),
    BatchNormalization(),
    Dropout(0.5),Dense(10, activation='softmax')
])
Building the Compute Environment in Domino
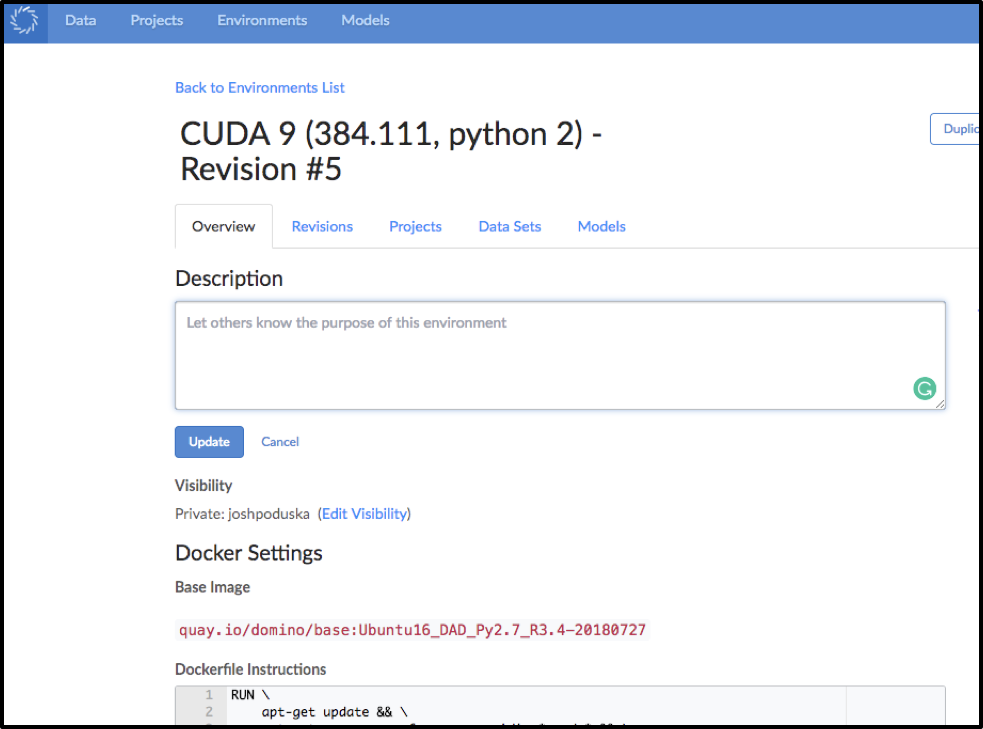
Entering Dockerfile Instructions in Domino

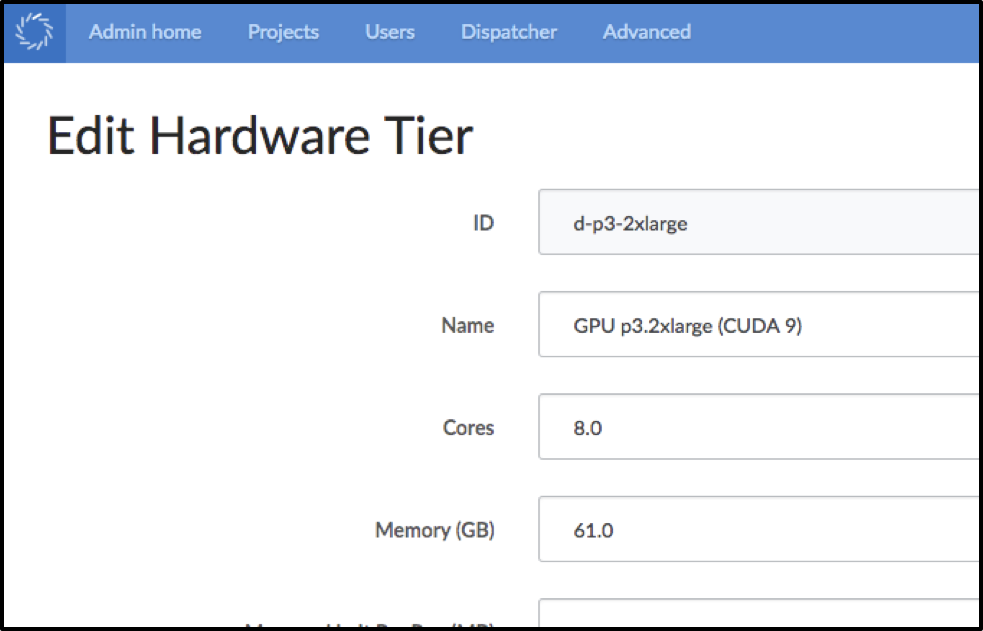
Setting up the Hardware Tiers in Domino

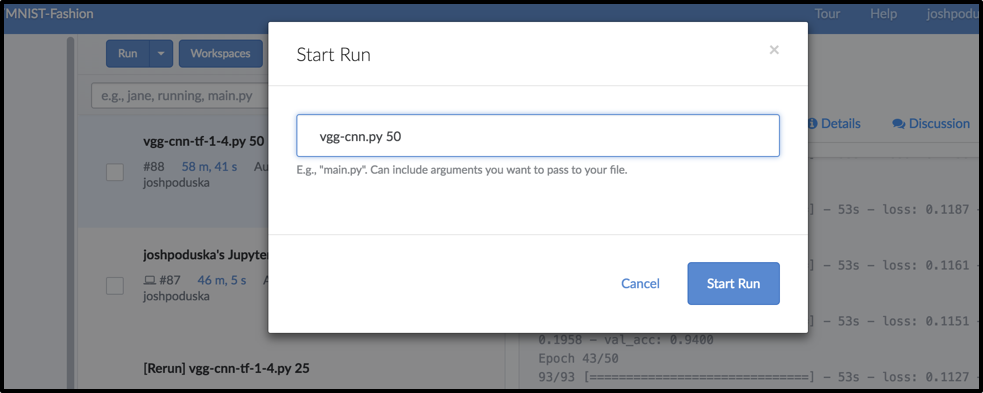
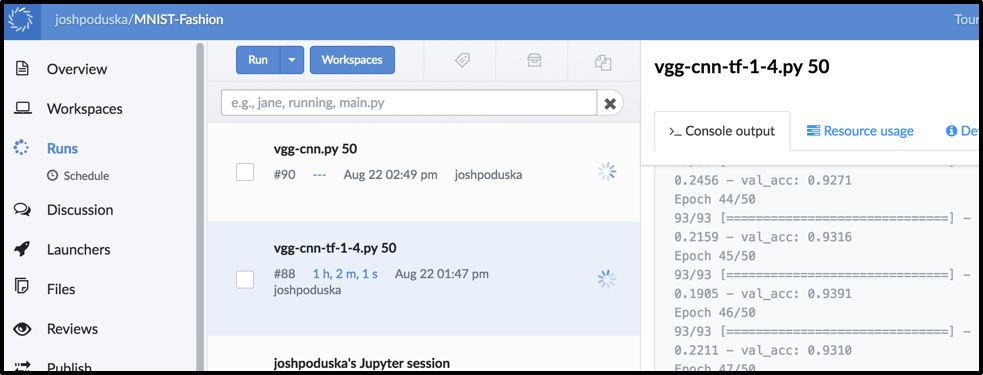
Kicking of a Run and Passing a Parameter in Domino
Running in Parallel on Domino
(P3 C9 and P2 C8 each with 50 epochs running simultaneously)
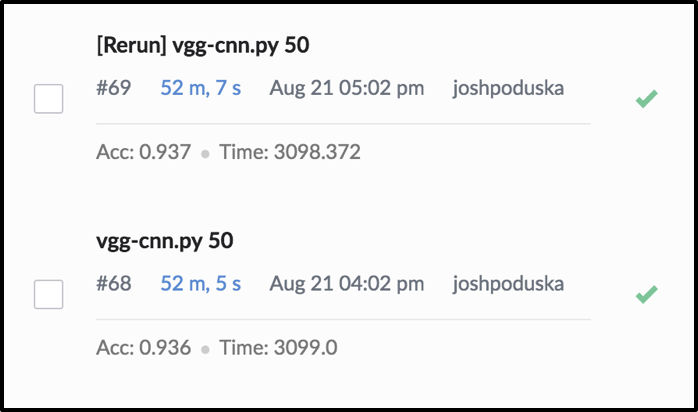
Run Time and Accuracy Recorded in Domino for Easy Comparison
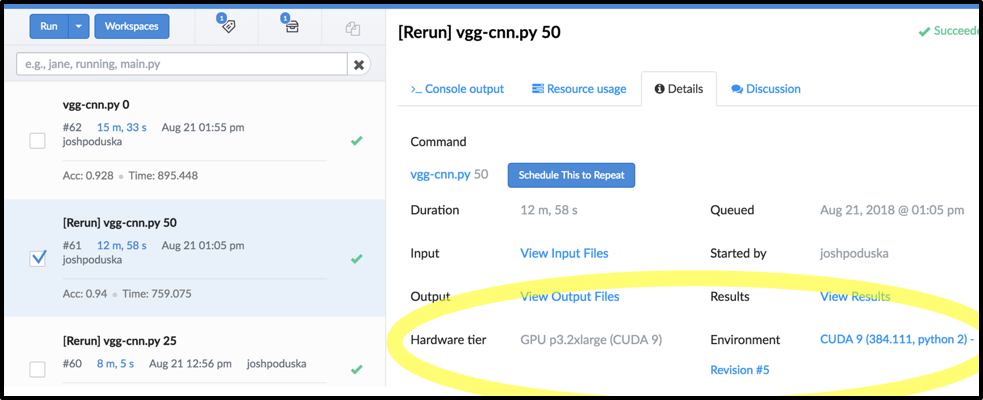
Configuration Details Automatically Captured in Domino
This was one of the most useful aspects of using Domino for this benchmark. As I ran the benchmarks and troubleshot a few issues (especially getting the code to work for TF 1.4.1 on CUDA8 and P2), it was super helpful to be able to go back to a previous run and see the exact environment and hardware tier details that run used. This was invaluable for reproducibility and navigating my project.
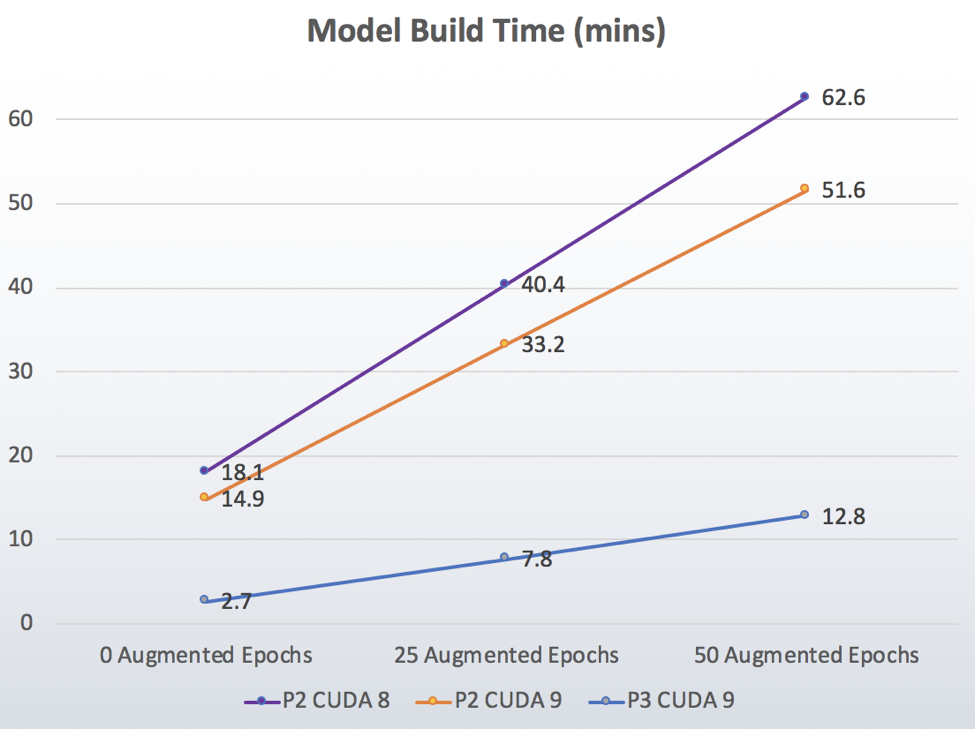
Benchmark Results
Two runs were performed at each setting for a total of 18 runs. Those two runs were averaged for the final results shown below. In every test, the two runs were almost identical for model training time (the main purpose of this benchmark). The accuracy numbers trended up with the number of augmented epochs, but jumped around slightly.
Video Comparison from within Jupyter using Domino

Conclusions
This benchmark demonstrated that:
• CUDA 9 on P3 ran about 4.9x faster than CUDA 8 on P2!
• Going from CUDA 8 to CUDA 9 on the P2 instances saw a 1.2x boost in speed.
• Going from P2 to P3 while holding CUDA 9 constant got about a 4x boost.
In order to do an apples-to-apples comparison, let’s look at the cost to train the network. Pricing for P3.2xl is $3.06/hour, and p2.xl is $0.90/hour. Training times were 12.8 minutes and 51.6 minutes respectively, so the training cost was $0.6528 for P3.2xl and $0.774 for p2.xl. Not only does the P3 beat the P2 in performance, but it also costs less.
The result? CUDA 9 clearly adds value over CUDA 8, and the improvements that come with the P3 instances were impressive. It was a lot of fun to give this new technology a test drive.
The Amazon EC2 P3 instances with CUDA 9 are the real deal. The models run so fast, making it much easier to iterate on and test new networks. I’m sure you’ll find your deep learning much more productive as you adopt this new technology.
1 TF changed how they distributed their pre-built binaries to using CUDA 9 starting after 1.4. We could have built these from source so that latest TF would have worked with CUDA 8 but who's got time for that?

Josh Poduska is the Chief Field Data Scientist at Domino Data Lab and has 20+ years of experience in analytics. Josh has built data science solutions across domains including manufacturing, public sector, and retail. Josh has also managed teams and led data science strategy at multiple companies, and he currently manages Domino’s Field Data Science team. Josh has a Masters in Applied Statistics from Cornell University. You can connect with Josh at https://www.linkedin.com/in/joshpoduska/


Subscribe to the Domino Newsletter
Receive data science tips and tutorials from leading Data Science leaders, right to your inbox.
By submitting this form you agree to receive communications from Domino related to products and services in accordance with Domino's privacy policy and may opt-out at anytime.